
Running a Test Simulation
Before starting a simulation, choose your start time from the timeline tool. Then follow the steps below to run a simulation.
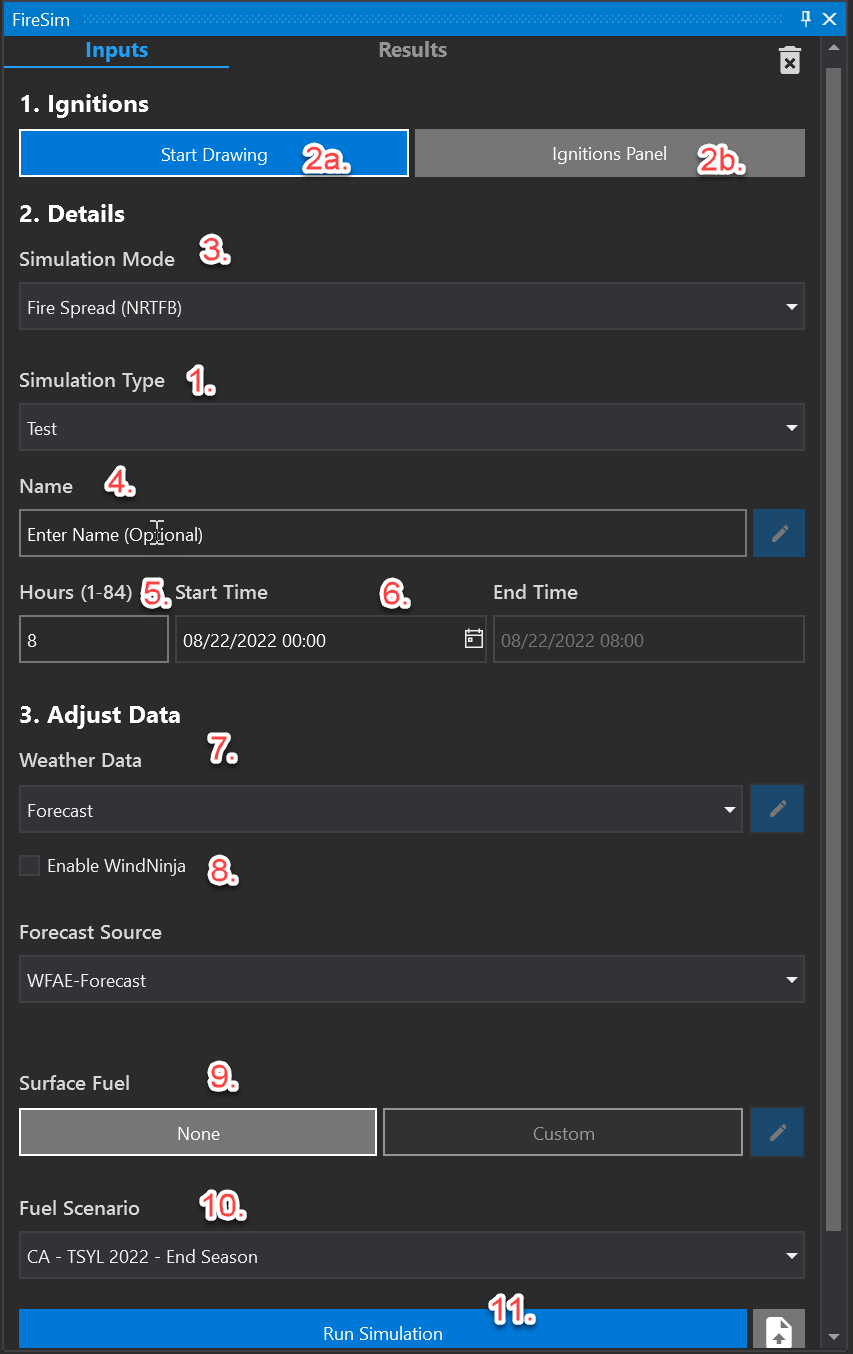
Steps:
Set simulation type to test
Add ignition location(s)
2a. Enter location(s) by clicking on map (select start drawing first).
i. Single-click on the map to add single point locations. You can add multiple ignition points.
ii. Double-click on the map to start drawing a line, single click to add vertices, and double-click to finish the line
iii. Click Stop Drawing to exit drawing mode and navigate the map without adding new ignition points
2b. Enter coordinates manually
i. Click on the Ignitions Panel
ii. Enter coordinates in decimal degrees format
iii. Press Update Selected Point to add the ignition point to the map
iv. Click Stop Drawing to exit drawing mode and navigate the map without adding new ignition points
3. Select Simulation Mode
Fire Spread (NRTFB)
Probabilistic (See Using Probabilistic Mode for info)
Exposure (See Using Exposure Mode for info)
Adjust
Static
4. Enter a Simulation Name
5. Enter/Confirm Duration for simulation to run
Duration start and end dates/times will be displayed to the right
6. Adjust Start Time
Enter a date/time in the Start Time field or select a Start Time time from the Timeline controls
7. Choose Weather Data to use - Forecast, Constant, or Station values
a. See Weather Data for Simulations for info about using Constant or Station values.
b. Most users should use the default forecast weather data.
8. Enable Wind Ninja if desired
9. Adjust Surface Fuel Data if desired
a. See Surface Fuel Data Conversion for Simulations for info about using the Surface Fuel Conversion Tool
b. Most users should use the default data.
10. Select the desired Fuel Scenario
11. Click Run Simulation